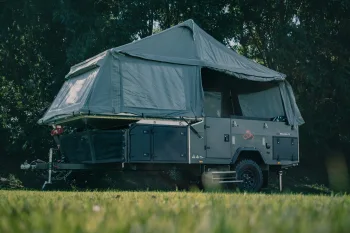
If you own a camper or RV, leveling it is one of the first things you should do after parking at a campsite. A level camper makes your stay more comfortable and helps protect important parts of the RV. Appliances such as refrigerators work best when the camper sits flat. Even small things like sleeping, cooking, and using the sink feel better when the camper is not leaning to one side.
Many first time campers worry about leveling their RV, but the process is not difficult. Once you learn the steps, it becomes part of your normal setup routine every time you park.
Leveling a camper is not just about comfort. It also protects your equipment and helps everything work the way it should.
One of the main reasons is the refrigerator. Many RV refrigerators depend on gravity to move coolant through the system. If the camper sits at a steep angle, the refrigerator may stop cooling properly. Over time this can cause damage.
Water flow is another reason. When the camper is level, sinks and showers drain normally. If the camper tilts too much, water may sit in the sink or drain slowly.
Leveling a camper does not require expensive equipment. Most RV owners use a few simple tools.
Some modern campers have built in levels installed on the front or side. If yours does not have one, a small bubble level from a hardware store works perfectly.
Before you begin leveling, take a moment to check the campsite. Look for the flattest area available.
Even if the ground is not perfectly flat, choosing the best spot can make the process much easier. Try to park in a way that reduces how much the camper leans from side to side.
If possible, park so the camper faces slightly uphill or downhill instead of leaning to one side. Adjusting front to back is usually easier than adjusting the sides.
The first adjustment should always be side to side leveling.
Place your bubble level on the floor inside the camper or on the frame outside near the axle. This will show which side is lower.
If one side of the camper sits lower, you will need to raise that side using leveling blocks or ramps.
Slowly drive the camper onto the blocks until the bubble shows the camper is level. This may take a few tries. Move slowly and check the level each time.
If you are using a towable camper or travel trailer, you can now disconnect it from the truck.
First lower the trailer jack slightly so it supports the front of the camper. Then remove the hitch from the tow vehicle.
After disconnecting, the camper will stay supported by the jack and the wheels.
Now it is time to level the camper from front to back.
Place the bubble level lengthwise on the floor or on the camper frame. If the front of the camper is too low, raise it with the tongue jack. If the front is too high, slowly lower the jack.
Make small adjustments and check the level each time. This helps you avoid raising or lowering it too much.
When the camper is level in both directions, the main leveling work is finished.
After leveling, lower the stabilizer jacks located at the corners of the camper.
These jacks help reduce movement when people walk inside the camper. They are not designed to lift or level the RV.
Lower each jack until it touches the ground. Tighten it just enough to make the camper feel steady. Do not raise the camper with these jacks.
If the ground is soft, place a wooden block or jack pad under each jack. This helps spread the weight and prevents the jack from sinking into the soil.
Once everything is in place, check the level again.
Walk inside the camper and move around a little. The floor should feel flat, and doors should stay in place when opened halfway.
Over time you will develop your own routine for leveling your camper. These tips can make the process faster and easier.
Carry extra leveling blocks when traveling. Campsites are not always perfectly flat, especially in older campgrounds or rural parks.
Install small stick on levels on the outside of the camper. Many RV owners place one on the front and one on the side. This makes it easy to see the level while parking.
Plastic leveling ramps are also helpful. They allow you to drive the camper onto the correct height instead of stacking blocks.
If you camp often, consider using jack pads. These small pads go under stabilizer jacks and help protect both the jack and the ground.
Sometimes campsites have slopes or uneven surfaces. In these situations, leveling blocks become very important.
Start by fixing the side to side level first. This usually requires the most adjustment.
If the ground slopes heavily, you may need several leveling blocks stacked together. Always stack them evenly and drive slowly onto them.
After fixing the side level, adjust the front to back level using the trailer jack. This step is usually easier because the jack can raise or lower the camper smoothly.
Take your time and check the level often when dealing with uneven ground.
Many new campers make small mistakes when leveling their RV.
One common mistake is trying to level the camper using stabilizer jacks. This can bend the jacks or damage the camper frame.
Another mistake is forgetting to use wheel chocks. Even a small slope can cause the camper to move slightly if the wheels are not secured.
Some people also rush through the process. A few extra minutes during setup can prevent problems later.
Sometimes the camper may settle after being parked for a few hours. This can happen if the ground is soft or after heavy rain.
It is a good idea to check the level again later in the day or the next morning. If needed, you can make a small adjustment with the tongue jack.
Learning how to level a camper is an important skill for any RV owner. It helps protect your appliances, improves comfort, and keeps everything inside working properly.
With the right tools and a simple routine, leveling your camper only takes a few minutes. After a few camping trips, the process will feel easy and natural.
Whether you are camping for a weekend or taking a longer trip, starting with a level camper helps you enjoy the experience without unnecessary problems.